Mold Remediation Process Guide for Property Owners
Seeing mold spread across drywall, baseboards, or ceiling corners can make a property owner feel like the damage is getting worse by the hour. This mold remediation process guide is here to make the situation clearer. If you know what happens first, what comes next, and where the risks are, it becomes much easier to make smart decisions and protect your home or business.
Mold is rarely just a surface problem. In El Paso properties, it often shows up after a plumbing leak, roof issue, HVAC condensation problem, or water damage that was not fully dried. What looks like a small patch on the wall may point to hidden moisture behind drywall, under flooring, or inside a crawl space. That is why proper remediation is not the same as spraying bleach and repainting.
What the mold remediation process guide should help you understand
A good mold remediation process guide should do two things. First, it should explain how professionals remove active mold contamination safely. Second, it should show why moisture control is the real key to keeping mold from coming back.
The goal is not to make a damaged area look clean for a few days. The goal is to return the space to a safe, stable condition by identifying the source, isolating affected materials, removing contamination correctly, and drying the structure thoroughly. In some cases, that means selective demolition. In others, it may mean cleaning and treating salvageable materials. It depends on how far the growth has spread and what materials are involved.
Step 1: Inspection and moisture detection
Every successful remediation starts with a close inspection. This is where a trained team looks for visible mold, tracks moisture movement, and identifies the likely cause of the problem. If a bathroom wall feels damp, a dishwasher line leaked behind cabinets, or an AC drain caused repeated moisture, those details matter.
Professionals typically use moisture meters, thermal imaging, and visual assessment to understand the extent of the issue. The affected area may be larger than the visible staining. Drywall, insulation, wood framing, carpet pad, and ceiling materials can all hold moisture differently.
This step is also where the team decides whether the mold damage is limited or widespread. A small isolated area in a utility room is handled differently than contamination that has traveled through multiple rooms or into HVAC pathways. That distinction affects containment, labor, timeline, and cost.
Step 2: Stop the moisture source first
If the leak or humidity issue is still active, cleaning alone will fail. Mold needs moisture to grow. As long as that condition remains, it can return even after an aggressive cleanup.
That means the source has to be corrected before or during remediation. It may involve plumbing repair, roofing work, appliance repair, drainage correction, or adjusting ventilation in a bathroom or laundry area. In commercial properties, the issue may come from roof penetrations, building envelope failures, or HVAC performance.
This is one of the biggest mistakes property owners make. They focus on the stain and not the source. The visible mold is the symptom. The moisture problem is the actual cause.
Step 3: Containment to prevent cross-contamination
Once the scope is understood, the next step is containment. This protects unaffected parts of the property while work is underway. Without containment, disturbing moldy materials can spread spores and debris into clean rooms.
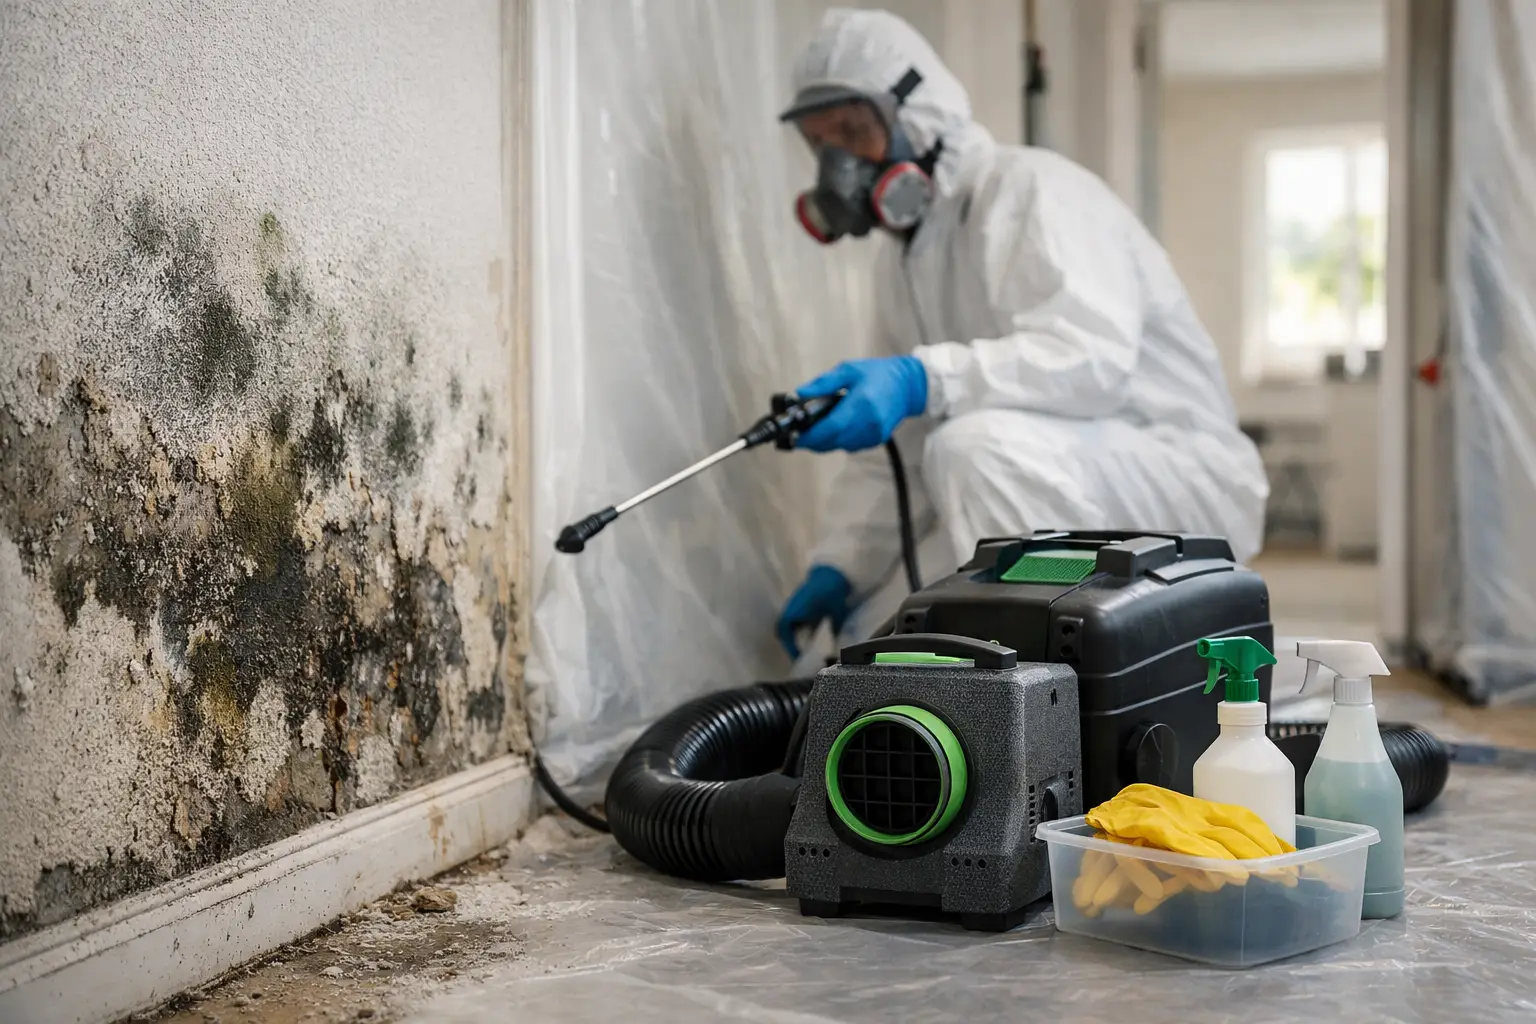
Containment usually involves plastic barriers, sealed work zones, and negative air pressure using specialized filtration equipment. In occupied homes or businesses, this step is especially important because it helps keep the problem from expanding during the cleanup itself.
The level of containment depends on the project. A small area may need limited isolation. A larger loss may require full chambering, controlled access, and air scrubbers running continuously. This is another area where professional judgment matters. Too little containment can create more cleanup later. Too much may add unnecessary time and cost.
Step 4: Remove damaged materials when needed
Not every material can be saved. Porous materials that have heavy mold growth or prolonged water exposure often need to be removed and discarded. This commonly includes drywall, insulation, carpet pad, ceiling tile, and some soft furnishings.
Non-porous or semi-porous materials may be cleanable if the damage is caught early and the material remains structurally sound. Wood framing, concrete, tile, and some hard surfaces can often be cleaned and treated rather than replaced.
This part of the process is where many people are surprised. Remediation is not always a simple wipe-down. If mold has penetrated behind a wall or beneath flooring, opening the assembly is often the only way to fully address it. Done correctly, selective demolition limits the spread and prepares the property for safe drying and repair.
Step 5: HEPA cleaning and controlled remediation
After unsalvageable materials are removed, the remaining surfaces are cleaned using mold-specific methods. Depending on the surface and severity, this may include HEPA vacuuming, damp wiping, abrasive cleaning, or antimicrobial application where appropriate.
The goal is to physically remove contamination, not just mask it. A surface that looks better but still holds spores and residue is not truly remediated. The cleaning process should be methodical and matched to the building material.
It is also worth saying that strong odors do not equal effective remediation. Some products leave behind a clean smell, but smell alone tells you very little about whether the underlying contamination has been addressed.
Step 6: Structural drying matters as much as cleanup
A proper mold remediation process guide has to emphasize drying because mold and moisture are inseparable. Once contaminated materials are removed and the area is cleaned, the structure still needs to reach appropriate dry standards.
That usually means using commercial air movers, dehumidifiers, and moisture monitoring to bring materials back to a stable condition. Drying times vary based on the type of material, how long it was wet, the size of the affected area, and ambient conditions inside the building.
Skipping or rushing this step can cause repeat problems. A wall cavity may look dry on the surface while the framing inside still holds moisture. That is why verification matters. Drying equipment should stay in place until readings support removal.
Step 7: Clearance, repairs, and rebuilding
Once remediation and drying are complete, the next phase is clearance and reconstruction. On some projects, third-party testing may be recommended, especially when there are health concerns, sensitive occupants, or larger contamination areas. On other jobs, visual confirmation and moisture verification may be enough, depending on the scope.
After that, rebuild work can begin. This may include replacing drywall, insulation, trim, flooring, cabinets, or paint. For many property owners, this is where having one company manage both remediation and reconstruction makes a major difference. It reduces handoff delays and keeps the project moving.
That full-service approach is one reason local property owners turn to GEM Disaster Recovery Corp when mold follows a leak or water damage event. Getting stabilization, remediation, and rebuild support from one team can make a stressful situation much more manageable.
What homeowners and managers should do right away
If you suspect mold, avoid disturbing the area more than necessary. Do not start tearing into walls without a plan, and do not assume household cleaners will solve hidden contamination. If the source is an active leak, shut off water if possible and keep people out of the affected area until it can be assessed.
Take photos, especially if insurance may be involved. Document where the damage appears, when you noticed it, and what may have caused it. For property managers and business owners, this kind of documentation can help with tenant communication, maintenance records, and claim support.
It is also wise to think beyond the mold itself. Ask whether the issue could affect adjacent units, shared walls, flooring transitions, or HVAC zones. In commercial spaces, even a contained mold issue can affect operations if the response is delayed.
Common questions about the mold remediation process guide
One of the most common questions is whether all mold requires professional remediation. Not always. Very small, isolated surface issues tied to minor condensation may be handled differently than contamination caused by a leak inside the wall. But once the source is uncertain, the area is growing, or porous materials are involved, professional assessment is the safer route.
Another question is whether insurance covers mold. Sometimes it does, sometimes it does not. Coverage often depends on the cause of loss, policy language, and how quickly the issue was reported and mitigated. Mold from a sudden covered water event may be treated differently than mold from long-term neglected moisture.
People also ask how long remediation takes. The answer depends on scope. A limited loss may take a couple of days. A larger project involving demolition, drying, clearance, and reconstruction can take much longer. Faster is not always better if key steps are skipped.
When mold appears, the hardest part is often not knowing how serious it is or what comes next. A clear process replaces that uncertainty with a plan. If the response is thorough, the moisture source is corrected, and the drying and repairs are done right, the property can move from contamination back to stability with a lot less guesswork and a lot more confidence.